The WooCommerce Discount Manager allows you to quickly set up different types of discounts. Below are the steps to create a Simple Discount.
Step 1: Add a New Discount
- Navigate to WiseCampaign → Discounts from your WordPress Dashboard.
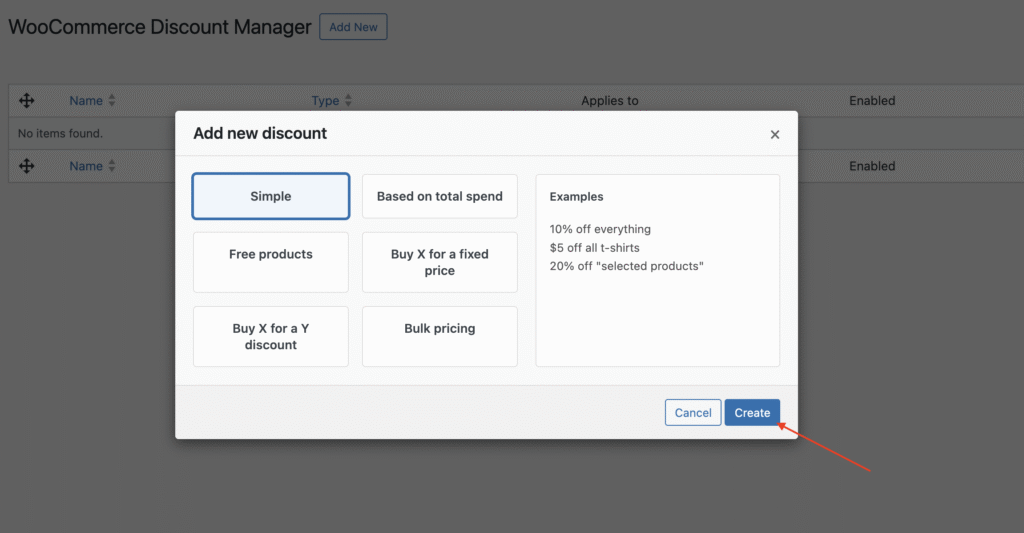
- Click the Add New button.
- A pop-up window will appear with six discount types:
- Simple
- Based on total spend
- Free products
- Buy X for a fixed price
- Buy X for a Y discount
- Bulk pricing
- Select Simple and click Create.

Step 2: Configure Discount Details
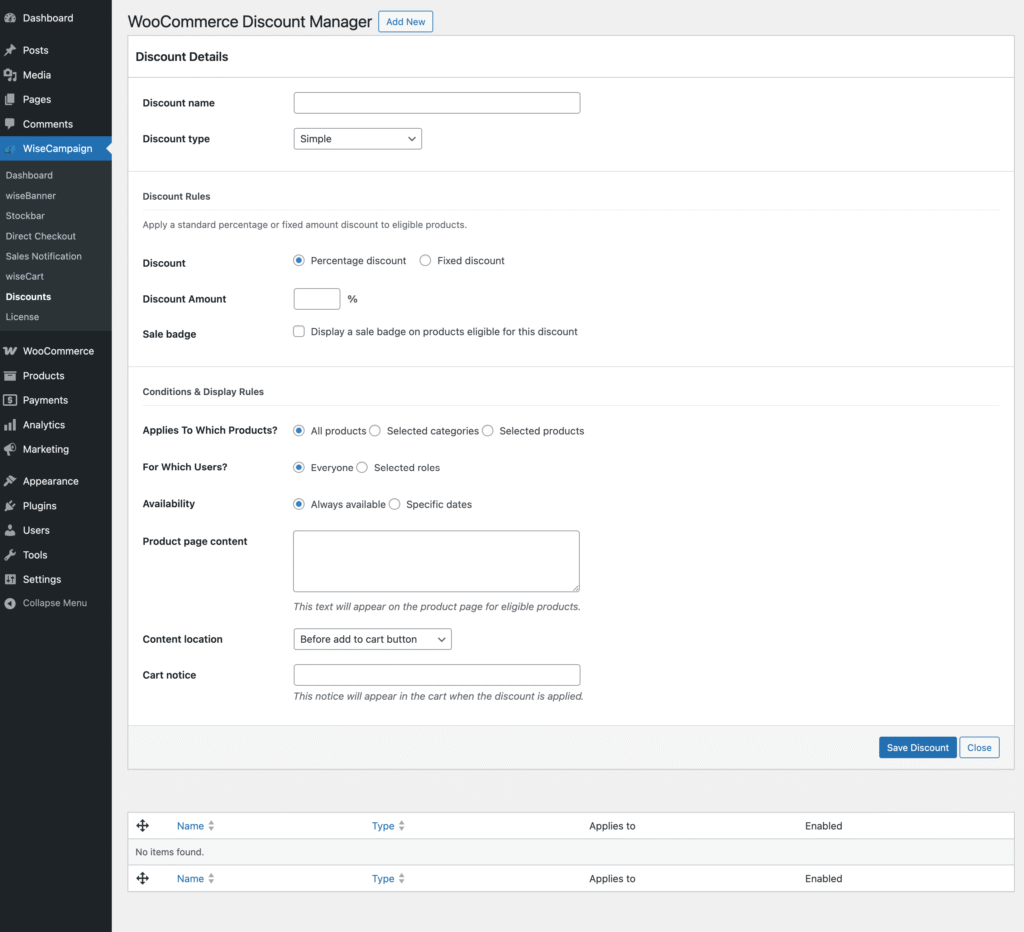
On the next screen, you can configure the discount settings:
Discount Details
- Discount Name: Enter a name for your discount (e.g., 10% Off Sitewide).
- Discount Type: Confirm that Simple is selected.
Discount Rules
- Discount: Choose either Percentage Discount or Fixed Discount.
- Discount Amount: Enter the discount value (e.g., 10% or $5).
- Sale Badge: (Optional) Display a sale badge on eligible products.
Conditions & Display Rules
-
Applies To Which Products?
- All products
- Selected categories
- Selected products
-
For Which Users?
- Everyone
- Specific roles
-
Availability:
- Always available
- Specific dates (choose a start and end date).
- Product Page Content: Add custom promotional text that will appear on product pages.
- Content Location: Choose where the text displays (e.g., Before add to cart button).
- Cart Notice: Add a message that appears in the cart when the discount is applied.
Step 3: Save the Discount
- Review your settings.
- Click Save Discount to activate the offer.

Example Use Case
- Discount Name: Back to School Sale
- Discount Type: Simple
- Discount: Percentage
- Amount: 15%
- Applies To: Selected category → School Supplies
- Availability: Specific dates (Sept 1–Sept 15)
Result: Customers automatically get 15% off all school supplies during the promotional period.