
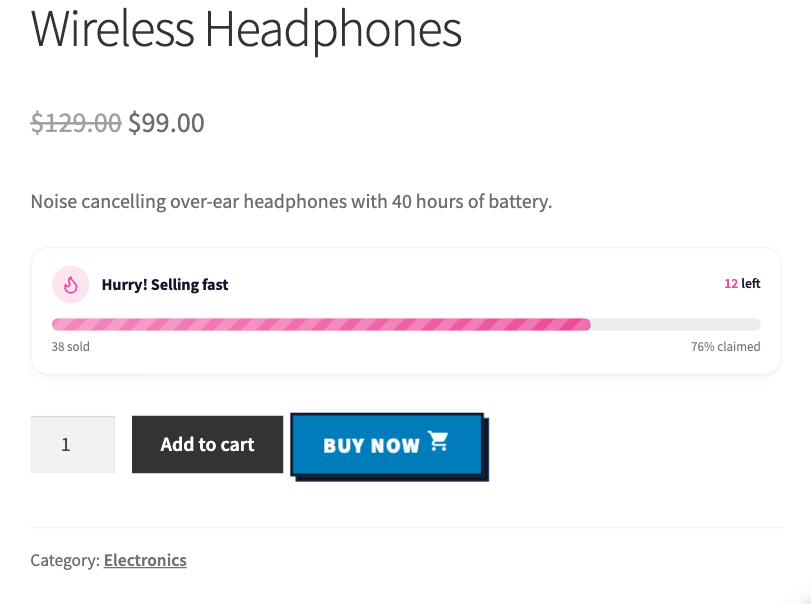
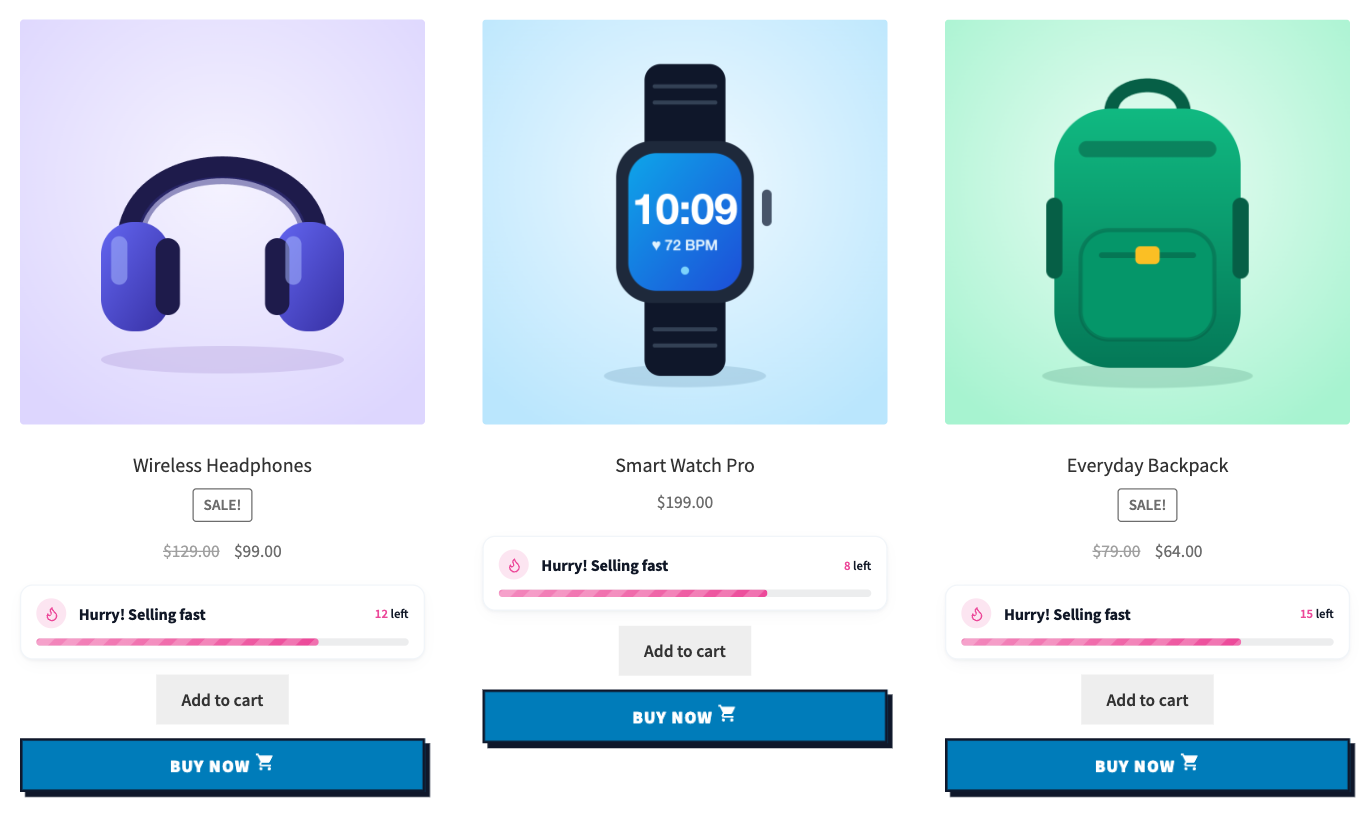
StockBar shows shoppers how many items are left and how many have sold, right on your product and shop pages. Seeing that stock is running low gives them a reason to buy now instead of later.
Before you start: track stock on your products
StockBar uses the stock numbers from WooCommerce, so it only appears on products that track their stock and have at least one item left.
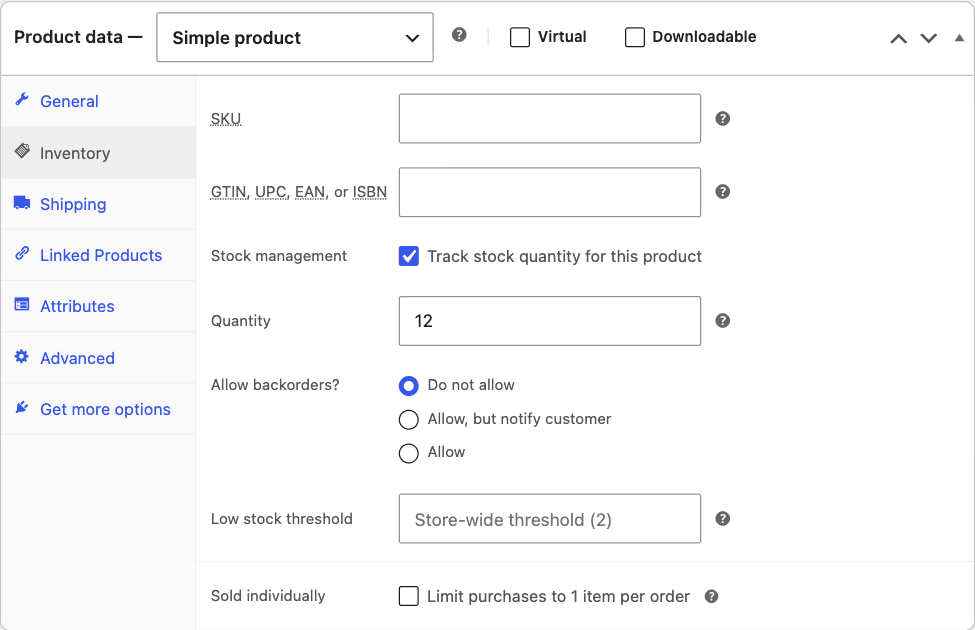
- Go to Products and edit a product.
- In the Product data box, open the Inventory tab.
- Tick Track stock quantity for this product and enter the Quantity.
- Click Update.
The “sold” number comes from the product’s WooCommerce sales count, so it grows on its own as orders come in.
Step 1: Open the StockBar editor
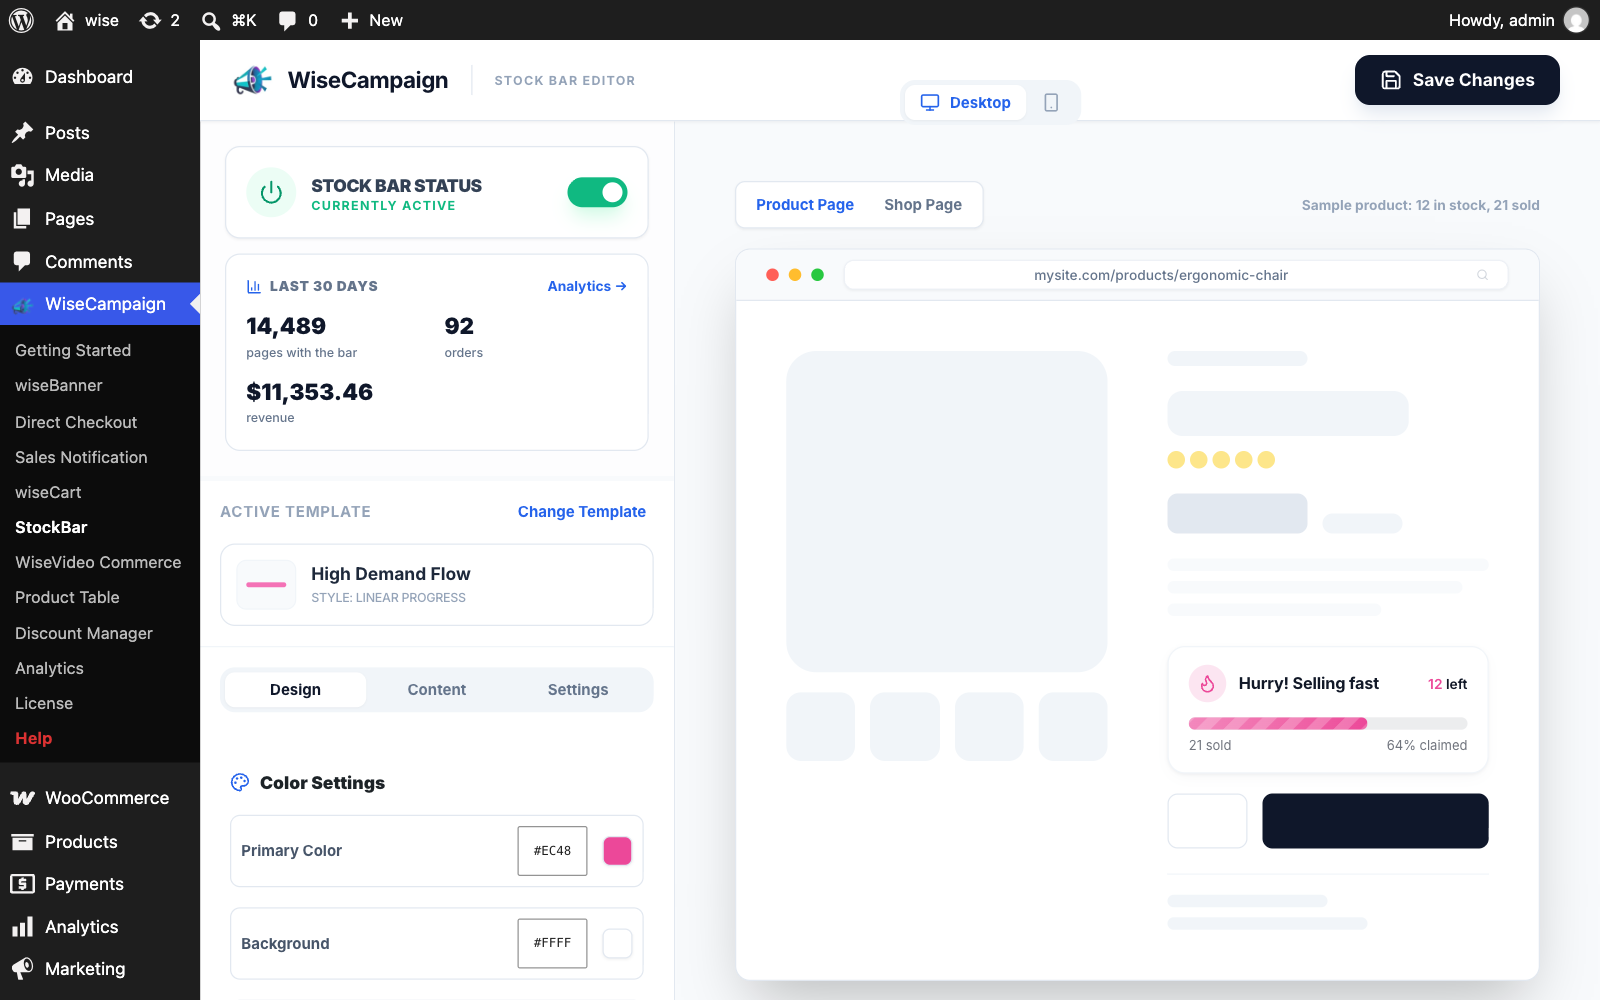
Go to wiseCampaign → StockBar. Your settings are on the left and a live preview is on the right. Switch the preview between Product Page and Shop Page, or between desktop and mobile, with the buttons above it. Every change shows in the preview straight away; nothing goes live until you click Save Changes.
Step 2: Turn StockBar on
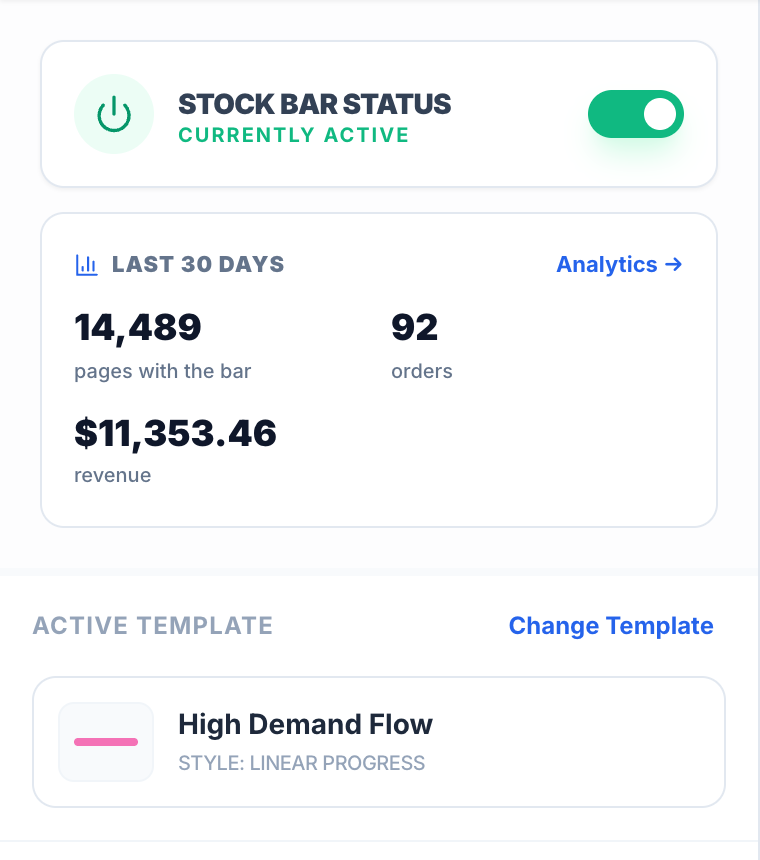
Use the Stock Bar Status switch at the top of the settings. Below it, the Last 30 days card shows how many pages displayed the bar and, with wiseCampaign Pro, the orders and revenue from products added to the cart next to it. Without Pro the card shows the last 7 days. Click Analytics for the full report.
Note: You can also turn the whole module on or off under wiseCampaign → Getting Started. When StockBar is off there, it leaves the menu and no longer loads on your store.
Step 3: Choose a template
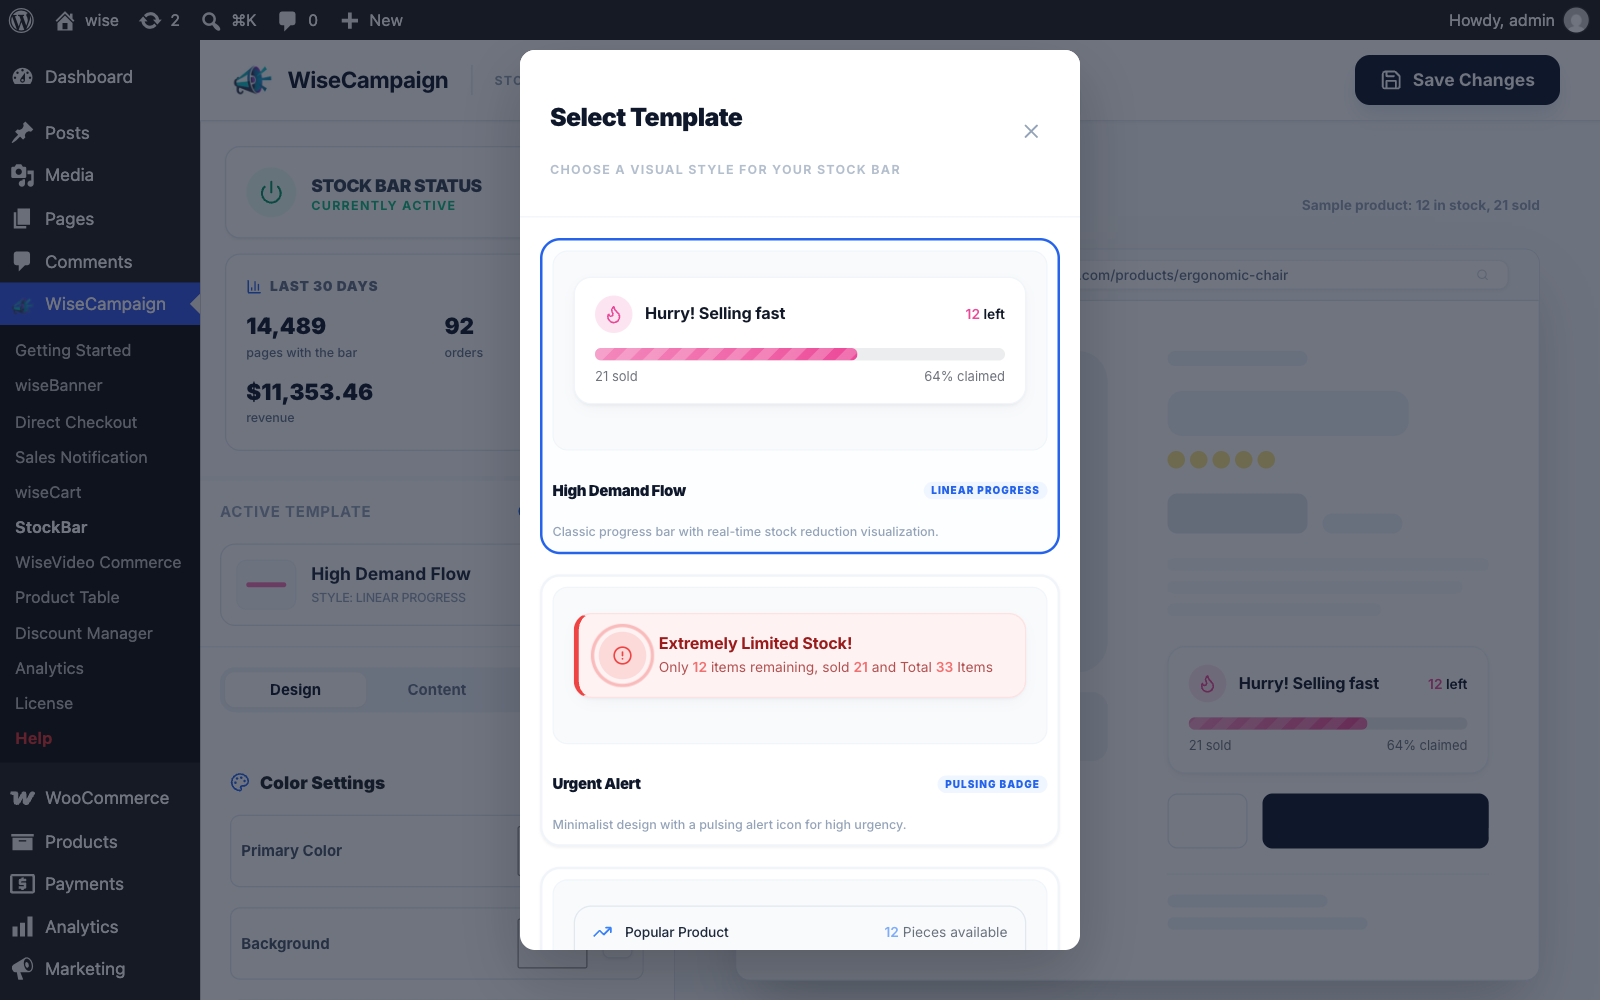
Next to Active Template, click Change Template and pick a style:
- High Demand Flow: a progress bar that fills up as stock sells.
- Urgent Alert: a bold alert with a pulsing icon.
- Modern Minimal: a simple stock counter.
- Flash Sale Timer: a countdown clock style.
- Low Stock Badge: a compact status badge.
Step 4: Match your brand on the Design tab
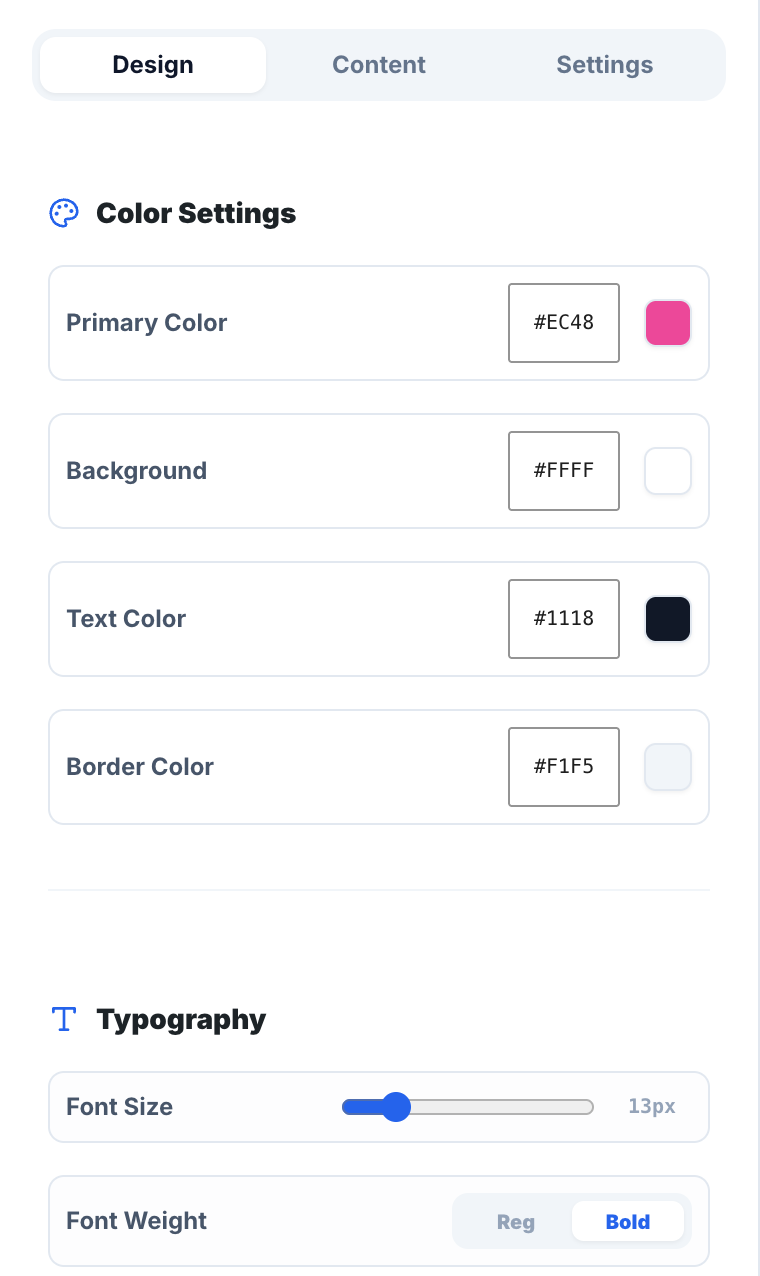
Set the Primary Color (the bar and icon), Background, Text Color and Border Color, then the Font Size and Font Weight.
Step 5: Write the message on the Content tab
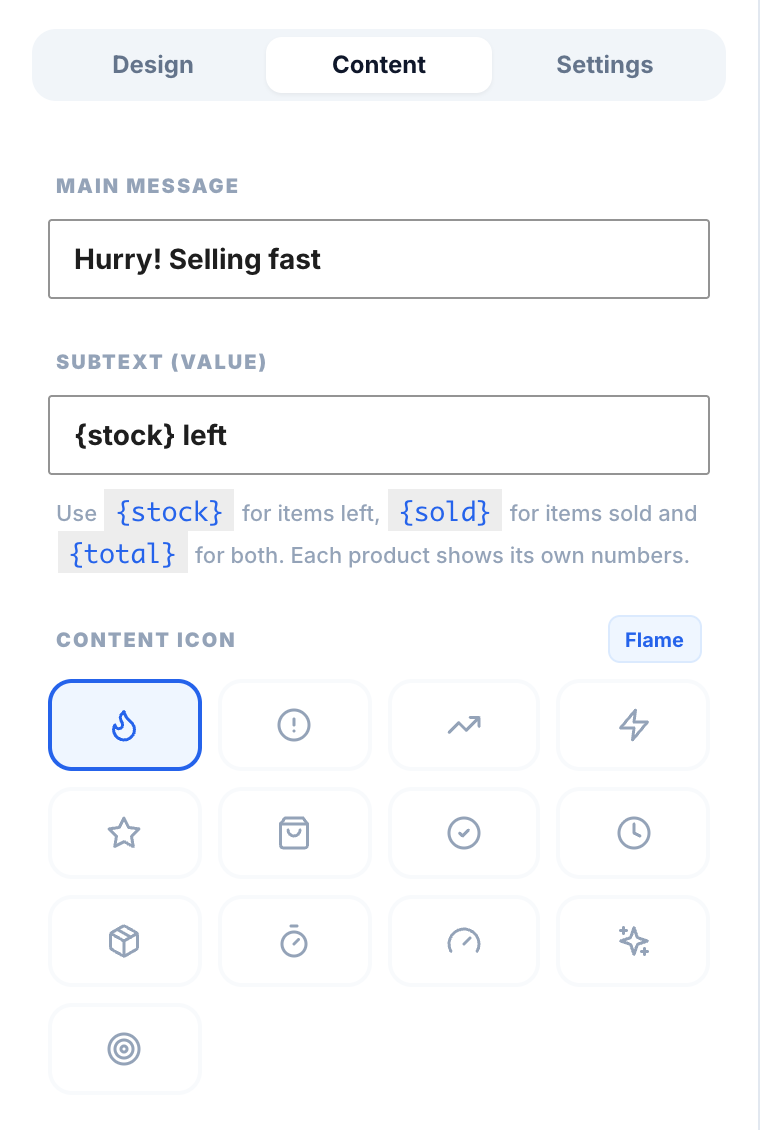
- Main Message: the headline, for example “Hurry! Selling fast”.
-
Subtext (Value): the number line. Use
{stock}for items left,{sold}for items sold, and{total}for both together. Each product shows its own numbers. - Content Icon: the small icon next to the message.
Step 6: Choose where it appears on the Settings tab
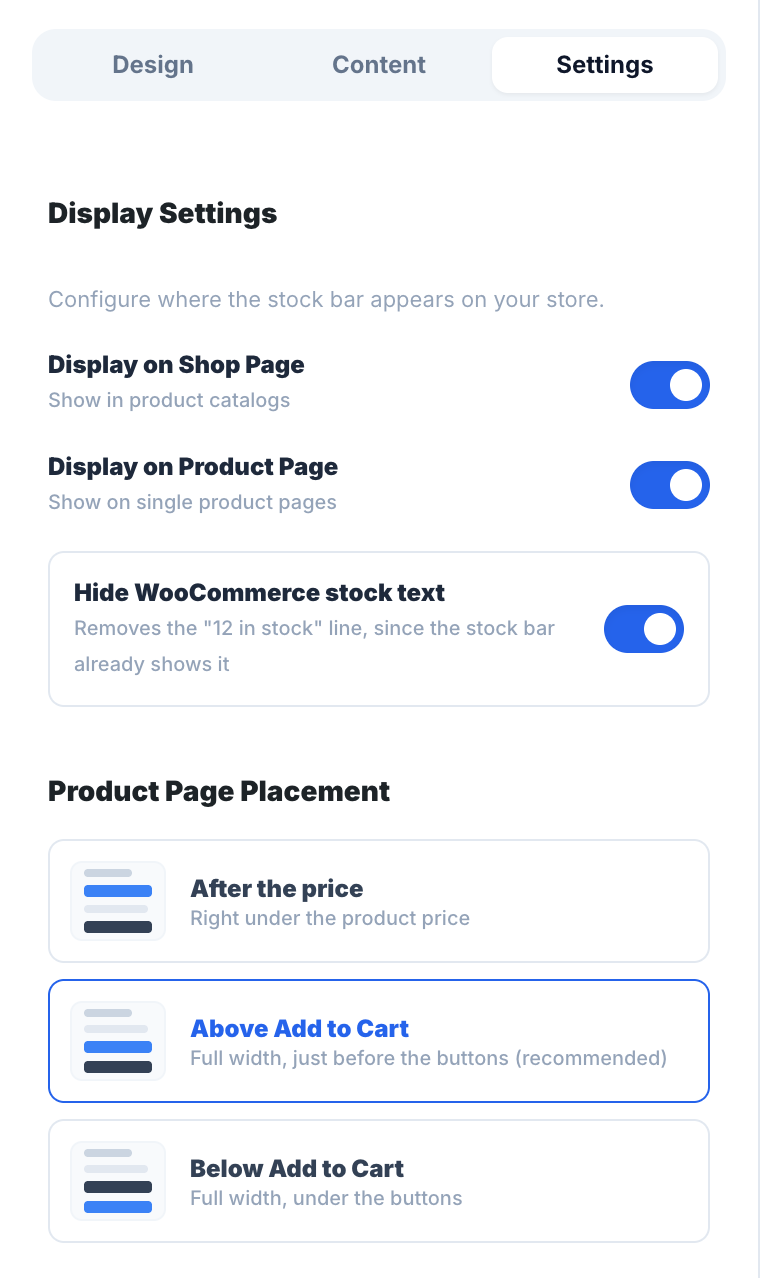
- Display on Shop Page: shows the bar under each product in your shop, category and tag pages.
- Display on Product Page: shows the bar on single product pages.
- Hide WooCommerce stock text: removes WooCommerce’s own “12 in stock” line, since the bar already shows the count. On by default.
- Product Page Placement: After the price, Above Add to Cart (recommended), or Below Add to Cart.
Step 7: Save
Click Save Changes in the top right corner. StockBar now appears on every product that tracks its stock.
Tip: StockBar works well with a Discount Manager offer or a wiseBanner sale: a deal plus visible low stock gives shoppers two reasons to buy today.